Hi all, I’ve moved to hippie-eats.com – please follow me over there by updating your feeds!
Mango Lassi
Only 8 days left to go on my Indiegogo campaign! I admittedly haven’t promoted it much at all, and it hasn’t been super successful because I think ten people read this blog consistently, but a huge thanks to everyone who has shared it on social media and told me nice things about my writing. I got my first (and only) donation this week, so let’s keep this ball rolling with another recipe!
Oh, how I love a good mango lassi. My favorite Indian restaurant in town, Tarka Indian Kitchen, serves the best one I’ve ever had. I’m going to let you in on a little secret: the recipe for a good mango lassi is a 1:1 ratio of mango and yogurt, with just a touch of added sweetener.
Mango Lassi
Serves 1 | Gluten-free, vegetarian
Ingredients
Plain unsweetened yogurt (I used White Mountain, a local Austin brand.)
1 large mango
1 tbsp. agave or honey (optional)
Equipment
Blender
Fork
Small bowl
Instructions
1. Before slicing it, give your mango a little massage. I had read this on a few different blogs with mango lassi recipes. Apparently, it loosens up the pulp and makes it easier to separate the meat from the pit.
2. Peel and slice your mango, which can be tricky, since it has a weird oval-shaped pit. I usually do it like this. Place the mango chunks into a small bowl.
3. Mash the mango with a fork into a pulp. Measure the pulp and take note of how much it is, because you’ll match that amount with the amount of yogurt you add. For example, if you had 3/4 c. mango pulp, you’d add 3/4 c. yogurt to the blender.
4. Add the mango pulp and the equivalent amount of yogurt into the blender. If desired, add agave or honey if you like your lassi on the sweeter side.
5. Blend until smooth and serve!
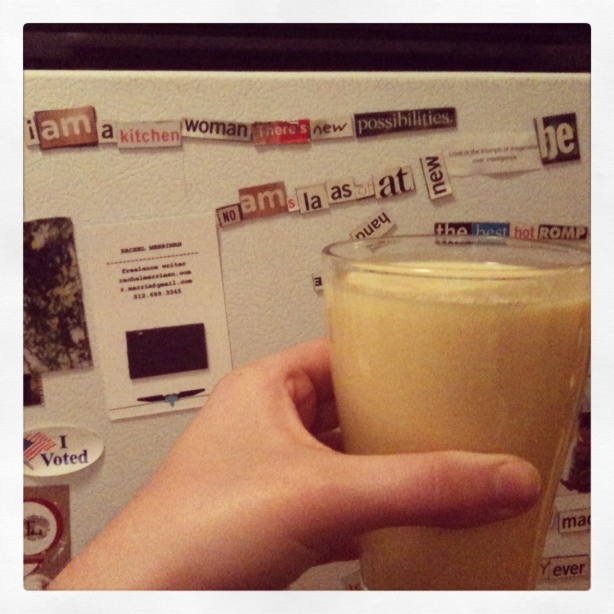
p.s. Do y’all like my magnetic poetry? I am a kitchen woman! (Rawr.)
Asian BBQ Tofu Tacos
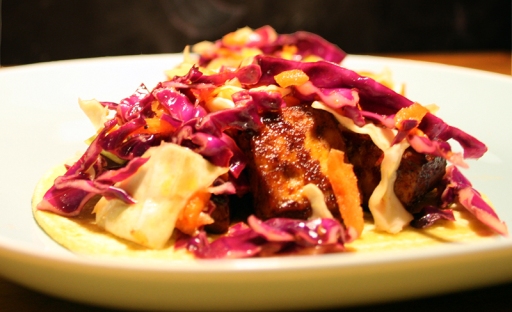
I had some slammin’ BBQ tacos at Texas VegFest a few months ago, and I’ve been hankering for something similar ever since. I made these for me and two other people last night, and they were so good that I made them for dinner again tonight! I baked the tofu similar to this recipe from Oh My Veggies, but I bet it would be fantastic grilled, too.
p.s. It’s day 21 of my Indiegogo campaign to make Hippie Eats a better blog! You get hugs, a handwritten thank-you card, blog advertising, writing/editing work, or a cooking class if you donate. Pretty sweet, if you ask me. Now, on to the tacos!
BBQ Tofu Tacos with Crunchy Asian Slaw
Gluten-free, Vegan | Serves 3-4
Ingredients
2 14 oz. packages extra firm tofu
1 c. barbecue sauce (plus extra for basting)
2 c. thinly sliced red cabbage
2 c. thinly sliced green cabbage
1 c. shredded carrots
4 tbsp. crunchy peanut butter
1 1/2 tsp. Sriracha chili sauce
2 tbsp. rice vinegar
2 tbsp. agave
2 tsp. Braggs liquid aminos or gluten-free soy sauce
6-8 gluten free tortillas
1. Preheat oven to 400 degrees.
2. Drain tofu and cut into cubes. Lay the cubes in between paper towels or a clean dish towel and gently press to remove excess water (I usually have to do this 3-4 times.)
3. Place tofu in a large bowl and add barbecue sauce. Gently toss to coat. Set the tofu aside to marinate while you prepare the slaw.
4. Combine sriracha, peanut butter, agave, rice vinegar, and Braggs in a large mixing bowl. Whisk until smooth.
5. Add red cabbage, green cabbage, and carrots to the bowl; toss until combined. Refrigerate the slaw until you are ready to assemble the tacos.
6. Lay tofu on a greased baking sheet (save any extra barbecue sauce remaining in the bowl!) Bake at 400 degrees for 20 minutes. Remove tray from oven, flip the tofu cubes over, and baste with extra sauce. Return try to oven and bake for another 20-30 minutes until the cubes are crispy on the edges. My tofu was dry, so I brushed another coat of barbeque sauce on there to finish it off.
7. Assemble the tacos! Place tofu cubes on a warmed tortilla and top with a scoop of slaw.
Spicy Cholula Black Beans
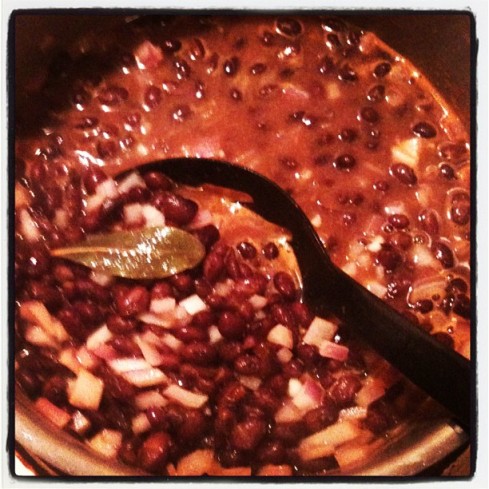
These beans are my food rut. I’m almost ashamed to admit that I make this same bean recipe for weeks in a row, but they are so good eaten all on their own and even better stuffed into a taco with some fresh avocado slices and quinoa. Who cares, really? Beans are the vegetarian lifeblood and Cholula is the nectar of the gods.
Before you get on to the recipe, I have some news: It’s the first day of my Indiegogo campaign to make Hippie Eats better! I’m trying to raise funds for advertising, branding, and quality ingredients by my 24th birthday on June 30. If you’ve ever made one of these recipes, liked my photos on Instagram, or liked one of my posts, please take a minute to check it out. Thanks, y’all!
Spicy Cholula Black Beans
Makes about 4 cups
Ingredients
2 15 oz. cans black beans, drained and rinsed
2 tsp. Cholula hot sauce (I used the original, but go nuts with the other flavors and let me know what you think!)
1 tsp. garlic powder
1/2 tsp. ground cumin
1/2 tsp. paprika (I used smoked paprika, which makes everything better.)
1/2 tsp. sea salt
1/4 tsp. white pepper
1 bay leaf
1/2 c. finely chopped red onion
1 c. water
2 tsp. olive oil
Directions
1. Heat olive oil in a saucepot. Add onion and cook until soft and fragrant.
2. Add drained beans, water, and spices; stir, and simmer on medium heat until most of the water is dissolved. It’s that easy!
Roasted Balsamic Brussels Sprouts
Hey y’all, its been a while! After a fervent post-grad job hunt, I finally got a new job writing at a software company after working at the most amazing bakery and cake shop in Austin for four years. I’m working there as a part-time contractor, so I’ll be filling my new-found spare time by continuing to write for local magazines and getting back to what I love most: food blogging!
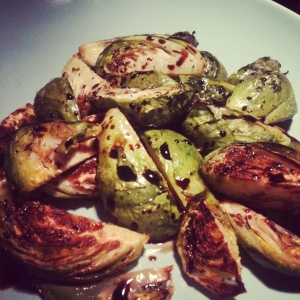
Nick and I went to East Side King for our anniversary last month, and hot damn, did I fall in love with those fried brussels sprouts like everyone else in Austin has. Since then, I’ve incorporated them into my repertoire of vegetables and don’t know how I ever lived without them. Excluding ESK’s amazing veggie meshi, this is my favorite way to eat them, by far.
Roasted Brussels Sprouts with Balsamic Reduction
Serves 3-4
Ingredients
1 pound brussels sprouts
1 c. balsamic vinegar
1/4 c. granulated sugar
Salt and pepper
Olive oil
Directions
1. Preheat the oven to 400F.
2. In a small saucepan, bring 1 cup of balsamic vinegar to a simmer. Add 1/4 c. sugar and stir until the granules are dissolved. Keep at a slow simmer for 20-25 minutes, stirring occasionally, until the mixture has reduced to a syrup. When finished, turn off the burner but leave the pan sitting there so it keeps warm.
3. As the balsamic reduction is cooking, wash brussels sprouts and cut them into quarters (lengthwise.) Spread evenly on a foil-lined baking sheet and drizzle with olive oil. Toss to evenly coat the sprouts in oil, then sprinkle with salt and pepper. Cook for 15-20 minutes, until they are fully cooked and the outer leaves are crispy.
4. Lightly drizzle with the balsamic reduction and serve. You may have leftover reduction depending on how sweet you like your sprouts; it keeps well in the fridge for well over a month.
Pucker Up! Lemon Bars
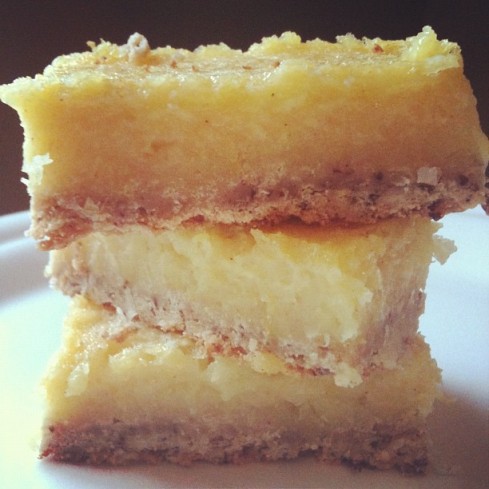
I’m going to start by saying that finding the perfect lemon bar recipe has been something like a saga, or perhaps even an odyssey. As simple as this sour treat might seem, recipes for lemon bars are all over the board. Though the flaky shortbread crust is almost always the same, the ingredients for the lemon filling vary widely. I can safely say I’ve tried most of the variations: flour, no flour, cornstarch, egg yolks only, butter, no butter; I felt that even Deb Perelman of Smitten Kitchen‘s genius idea to puree a whole de-seeded lemon into the filling would surely do the trick for my sour-loving palate. Yesterday, I threw all caution to the wind and decided to try crafting a recipe from scratch, starting with a whole lotta lemon zest.
It only gets better from there, I promise. Make ’em for your sweetie for Valentine’s Day, especially if they’re like my beau, who doesn’t like cake (!!!) but is a sucker for anything lemon.
Pucker Up! Lemon Bars
Makes 1 9″ by 13″ pan
Ingredients
For the crust:
1 c. oat flour (to make oat flour, throw some gluten-free oats into your food processor)
1 c. sorghum “sweet white” flour
1/4 c. flaxseed meal
1/4 c. coconut flour
1/4 c.granulated sugar
1/4 tsp. salt
1 1/2 sticks butter
For the lemon filling:
6 large organic lemons*
2/3 c. lemon pulp puree
2/3 c. lemon zest
3/4 c. freshly squeezed lemon juice
6 organic pasture-raised eggs
1 1/2 c. granulated sugar
1/4 c. cornstarch
1/2 c. sorghum “sweet white” flour
* Because this recipe calls for lots of zest, I highly recommend springing for organic lemons, which contain no pesticide residues.
Directions
To make the lemon filling:
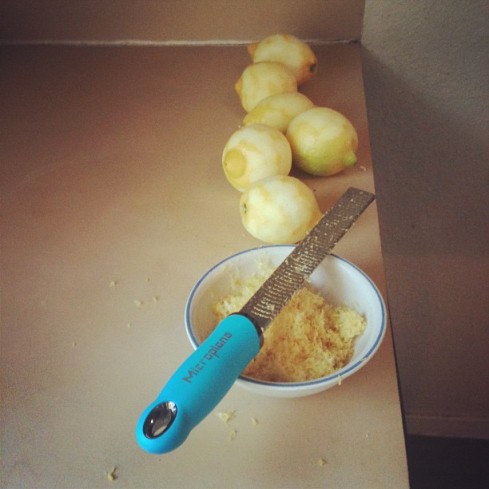
1. Using a microplane zester, zest all six of your lemons. Measure 2/3 c. lemon zest (you might have extra!) and set aside in a small bowl.
2. Using a very sharp knife, slice your lemons into medium-sized wedges (about six per lemon) and gently squeeze the juice into a liquid measuring cup until you reach 3/4 cup. Strain to remove any seeds, then pour into a large mixing bowl and set aside.
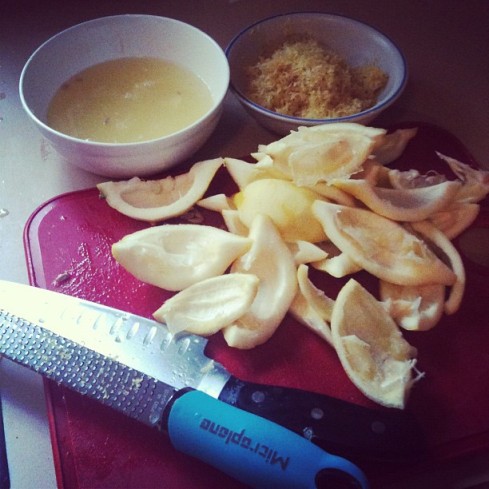
3. Carefully peel the lemon flesh away from the skin, remove any seeds, and place into a food processor or blender. If you like to clean as you go, go ahead and discard the skins! I was rather messy about this process, as you can see:
4. Puree the lemon flesh until smooth. Six large lemons yielded a little more than the 2/3 of a cup necessary for this recipe, so be sure to measure 2/3 of a cup and discard the rest. If you have a bit less than 2/3 of a cup, add a little extra lemon juice.
5. Return 2/3 c. lemon pulp puree back to the food processor and add 2/3 c. lemon zest. Blend until smooth, then add the mixture to the lemon juice.
6. Add 6 organic eggs and stir to combine.
7. In a separate bowl, mix sugar, cornstarch, and flour. Add the lemon mixture and whisk gently until ingredients are combined.
8. Set the bowl of lemon filling aside and preheat the oven to 350 degrees.
To make the crust:
1. In a large bowl, combine flours, salt, and sugar and mix until well incorporated.
2. Cut room temperature butter into small pieces, and mix with a fork or your hands until it forms a flaky dough.
3. Line the bottom of a 9″ by 13″ pan with wax paper. Grease the bottom and sides of pan with butter or cooking spray. Gently press the dough into the bottom of the pan and pinch to form walls on the sides, so the edges of the bars won’t burn.
4. Bake the crust for about 15 minutes, until very lightly brown and dry to the touch. Remove and let cool slightly.
5. When crust has cooled, carefully pour the lemon filling into the crust. Return to the oven and bake for an additional 35-40 minutes, until the filling no longer moves when you shake the pan slightly. Don’t be afraid to watch them closely, especially if you have an oven light! Take them out at the faintest hint of browning.
6. Let the bars cool, then chill them in the fridge for a few hours before serving. For extra-pretty straight edges, freeze them overnight and then cut them into squares.
That’s all, folks. Happy Valentine’s Day!
Chai Spiced French Toast
I distinctly remember seeing chai french toast on a breakfast menu somewhere in town, but for the life of me, I can’t remember where. I must have blocked it out of my memory because I couldn’t order it, having sworn off gluten many months ago. Armed with some store-bought GF bread, though, I realized all my chai french toast dreams this morning (er, afternoon, seeing as I woke up around 1:00 today- yikes!)
Chai Spiced French Toast
Serves 3-4
Ingredients
1 loaf bread (I used Udi’s gluten-free bread, but use anything you like!)
5 large organic eggs
1/4 cup half and half
1/2 cup brown sugar
1/2 tbsp. Vietnamese cinnamon
2 tsp. ginger
1 tsp. cardamom
1/2 tsp. clove
1/4 tsp. salt
Directions
1. Lightly oil a skillet or pan and set to medium heat.
2. Crack your eggs into a large bowl or shallow, wide dish (such as a pie pan.)
3. Add half and half and the brown sugar, and whisk until combined with the eggs.
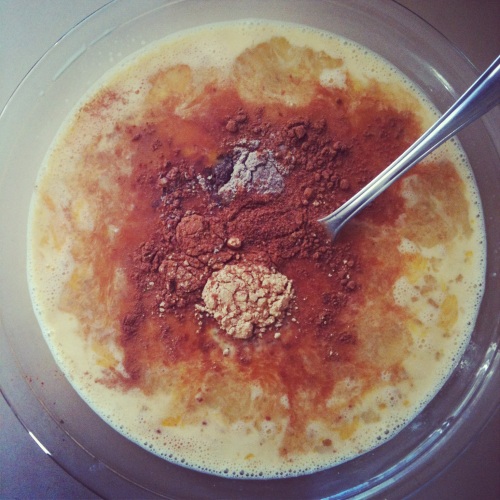
4. Add all of your spices and whisk, whisk, whisk until the mixture is smooth and light brown in color.
5. Coat both sides of bread in the custard and cook until golden brown on each side.
6. Add butter, syrup, or fruit if desired; but this french toast is sweet enough to eat on its own.
Although I think this recipe turned out smashingly, it’s my first time taking the flavors of a drink and applying them to something totally new. If you make this recipe and have any suggestions, please let me know!
food resolutions
Ah, it’s time for New Year’s resolutions! A lot of people are making resolutions about food this time of year, mostly about what they aren’t going to eat any more. While I’d love to swear off processed foods and cheese, I know myself enough to make resolutions I actually stand a chance at accomplishing. Here are my resolutions for 2013:
1. Ban all plastic and teflon from my kitchen. I threw away all my tupperware a few weeks ago, and have been using glass mason jars of various sizes to store my leftovers. It’s working out rather nicely. I also received a set of stainless steel pots and pans for Christmas, and so now I’m down to just a few teflon-coated pans until I buy a few more stainless steel pieces. My cooking utensils are still plastic, as is my cutting board… baby steps!
2. Eat more organic food. I graduated from college four months ago, but I’m still very much on what I lovingly refer to as “the starving college student diet.” I’ve been treating myself to buying a few organic vegetables and fruits at the store, and I figure that every little bit helps. If/when I land a salaried job this year, you can bet that I’ll be making the switch to all organic!
3.Engage with my fellow food bloggers. There are so many great local food blogs written by smart Austinites, and while I definitely read a lot of them on a regular basis, I rarely comment on their posts. I’m fairly shy by nature, and I’m working to overcome this in my personal and online interactions.
4. Make more meal plans and cook meals in advance. I work a full-time job and freelance on the side, and some days, it’s hard to come up with the energy to cook. If I planned my meals for the week and made a conscious effort to do some prep work on my days off, I would probably eat out much less and use all the food I buy instead of letting it go to waste. With all the money I’ll save by not wasting food and eating at restaurants, I’ll be able to buy more organic food!
5. Grow something with my own hands, then eat it. I have a great talent for killing my plants, consequently I’m absolutely terrified of starting a garden. I’m going to start with herbs and work my way up!
What are your resolutions?
deep purple smoothie
I know it’s cold in Austin today, y’all, but I still need some nutrients after eating leftover mashed potatoes and stuffing for days on end! Even though there’s plenty of greens in here, the pomegranate and blueberries in this smoothie turned it a lovely purple.
Deep Purple Smoothie
1 c. almond milk
1/4 c. frozen blueberries
1/4 c. frozen mango chunks
3 frozen peach slice
1 handful greens (or about 1 cup loosely packed)
1 banana
1/4 c. pecans
2 tbsp hemp protein powder
1/2 of a pomegranate
(Postscript: The pomegranate seeds made this smoothie kind of chunky, even though I blended it thoroughly. I’m sure this smoothie would be perfectly delicious without them, or you could substitute some pomegranate juice for the almond milk. Yum.)
power smoothie sunday
Green smoothies are one of my most favorite breakfasts, especially when I don’t feel like cooking. To mix things up, I added some unsweetened coconut flakes to my usual green smoothie to make what I’m now lovingly referring to as The Green Coconut.
The Green Coconut
1 cup unsweetened coconut milk
1 handful greens (spinach, chard, kale, etc.)
1 banana
3 frozen peach slices
3 frozen strawberries
5 frozen mango chunks
2 tbsp. unsweetened coconut flakes
Blend it all up, and don’t fret if your blender has a little trouble. I had to stop mine and push down the greens and banana a few times to get it all to mix properly. If you must, add more coconut milk a few splashes at a time, but be careful! Nobody likes a watery smoothie. After you drink it, you’ll feel as serene as the Buddha.
